8 Committing your changes and pushing them to GitHub
Following are the steps to take in committing your changes in RStudio and pushing them to GitHub.
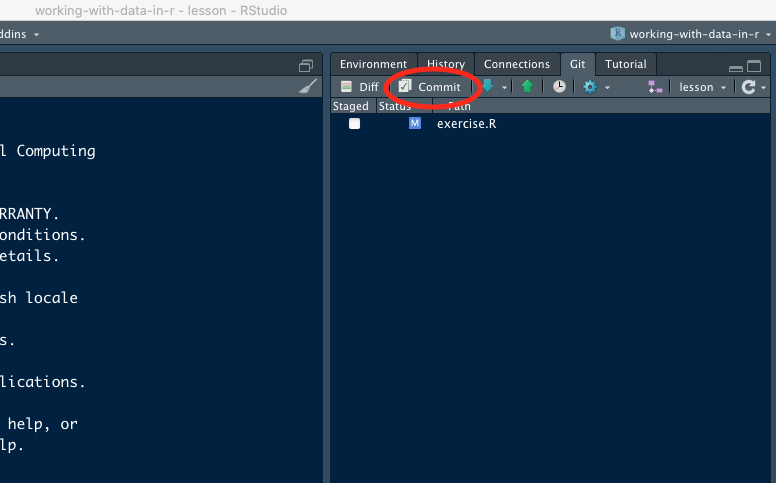
8.1 Click on Commit in the Git tab on RStudio
8.2 Getting changes saved and push to GitHub
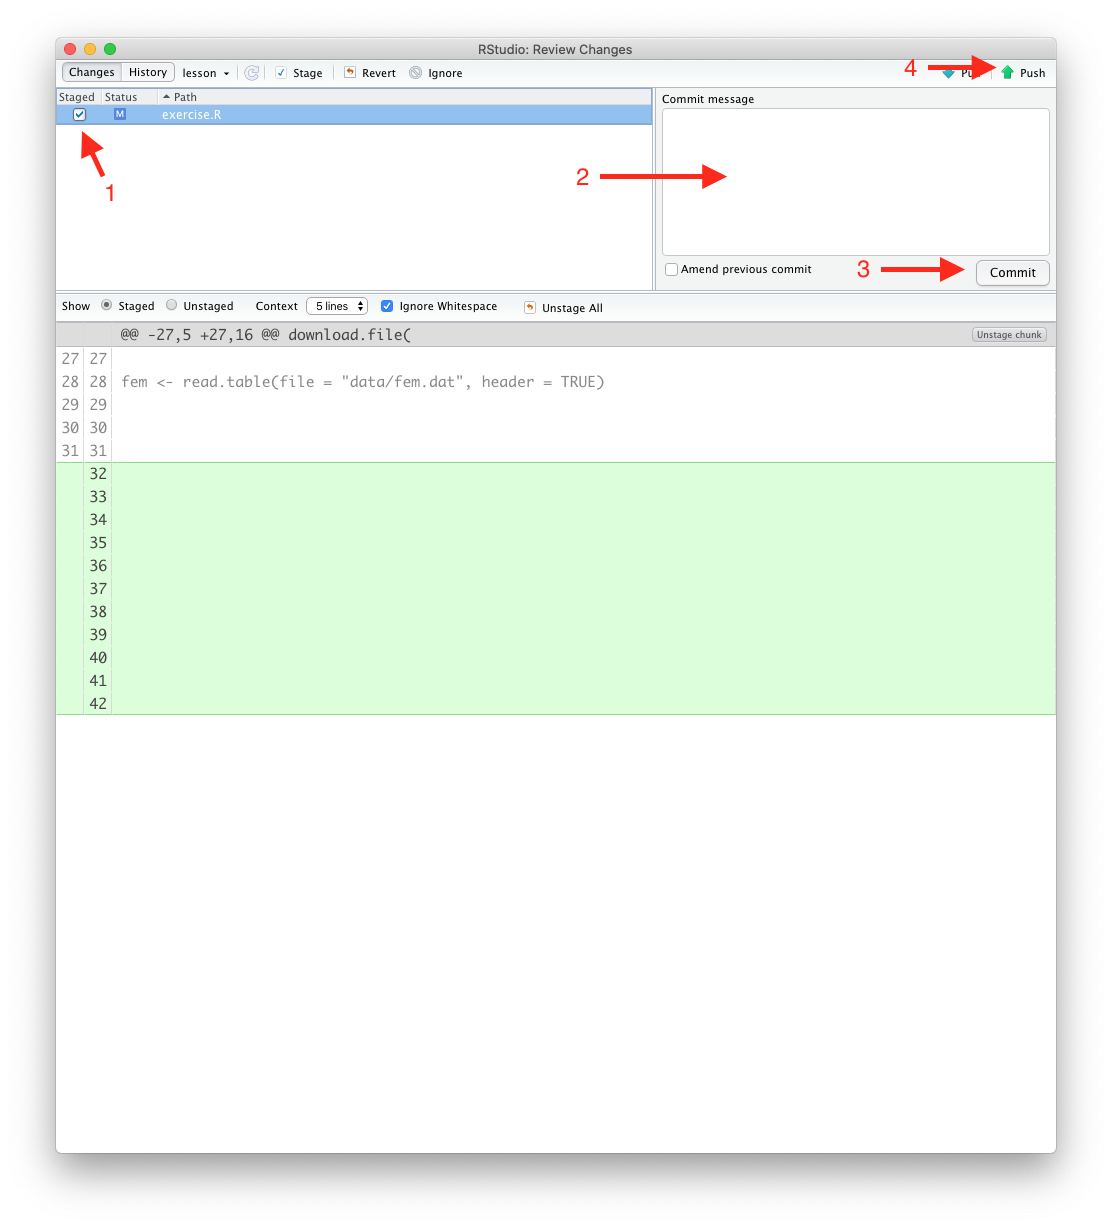
1. Stage changes
Tick the box beside the file that has changed to stage the changes.
2. Add a commit message
Every time you make a commit you must also write a short commit message.
Write a commit message in the Commit message dialog box. In the commit message, describe the changes that you made.
8.3 Initiate a pull request
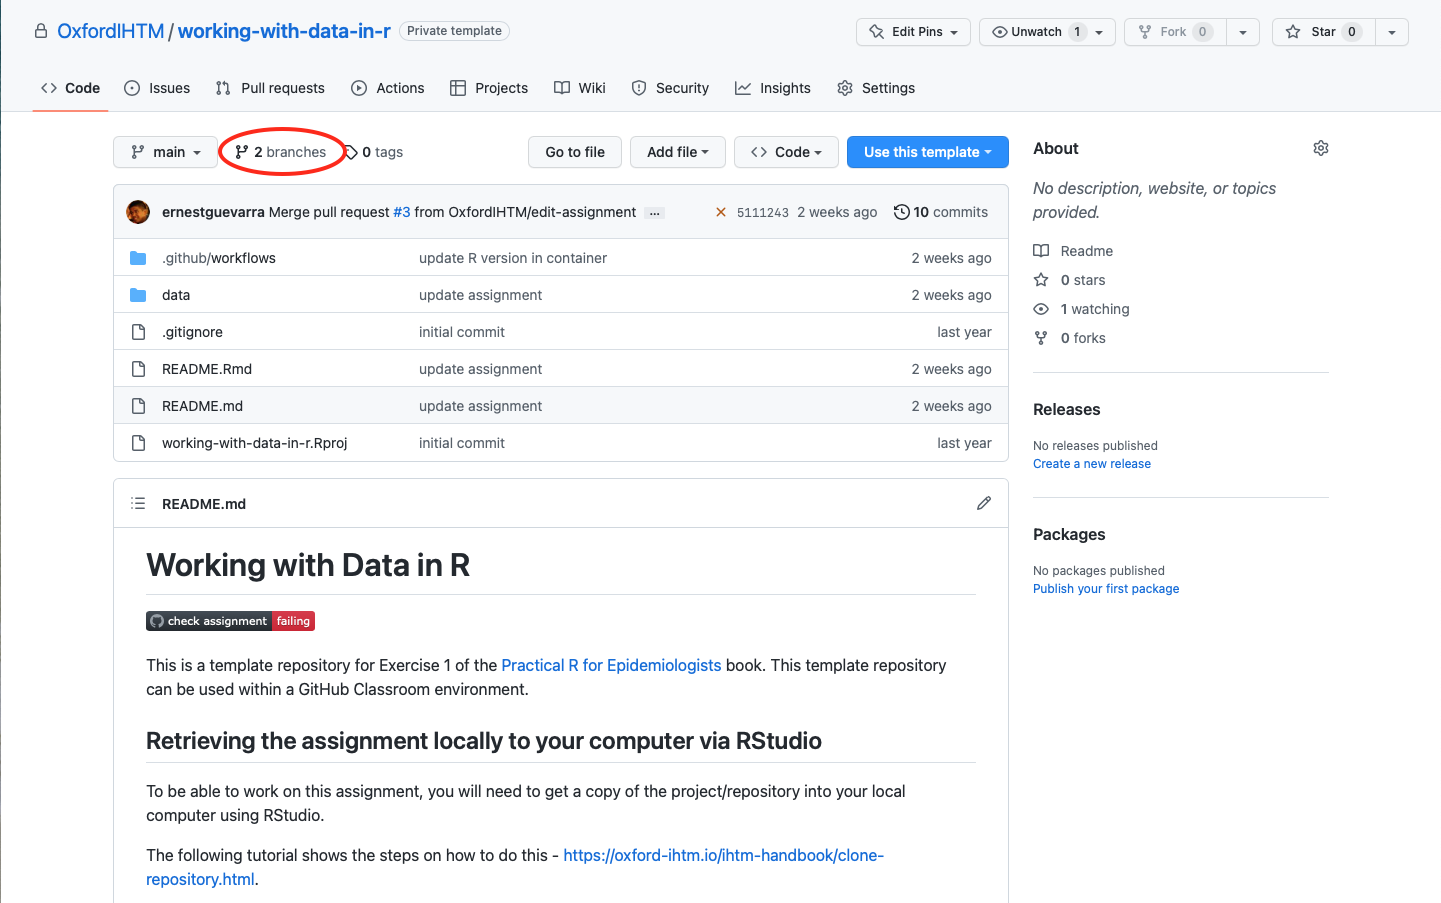
1. Click on the branches link from your repository
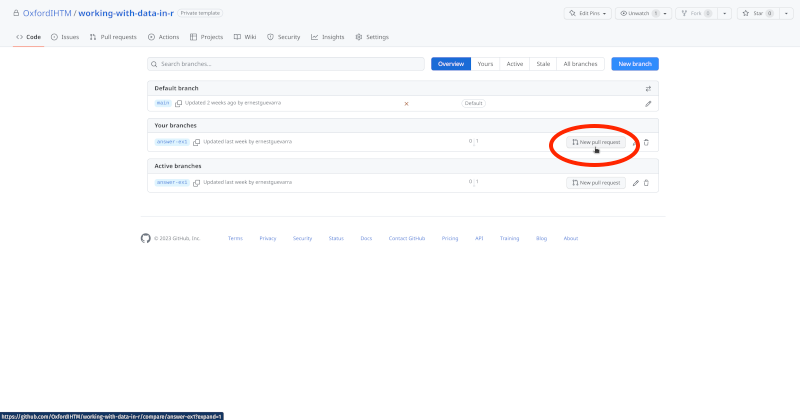
2. Make a pull request
Click on the Make pull request link on the appropriate branch.
3. Enter a title for your pull request
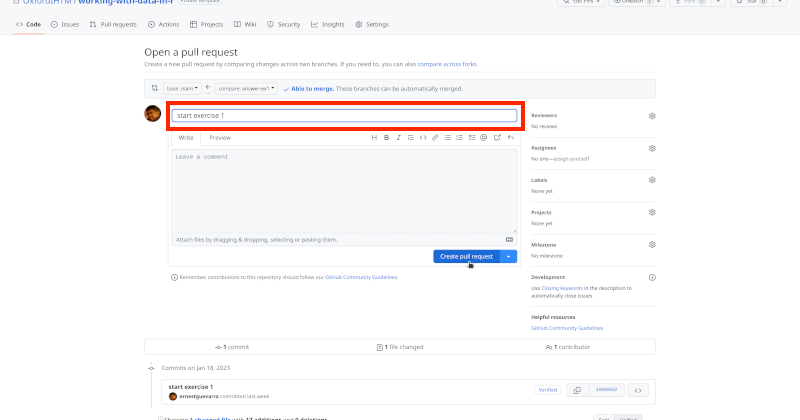
Make the title as short but as informative as possible.
4. Create a pull request
Add further description about the pull request (optional) and then click on Create pull request button
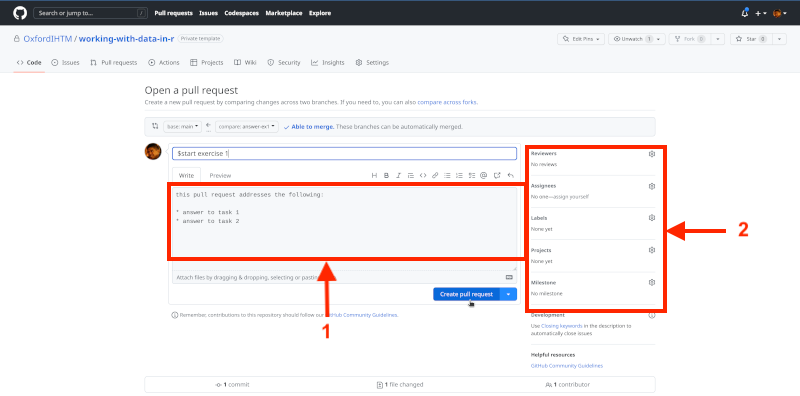
If you think more information will help the reviewer navigate through the changes you have made, use the comment box to add more details. This comments box can interpret Markdown syntax so you can format your text accordingly.
On the right hand side of the pull request page, you can set a specific reviewer for your pull request (recommended). Also, given that you are making this pull request, assign this pull request to you so you are notified of the progress of this pull request.
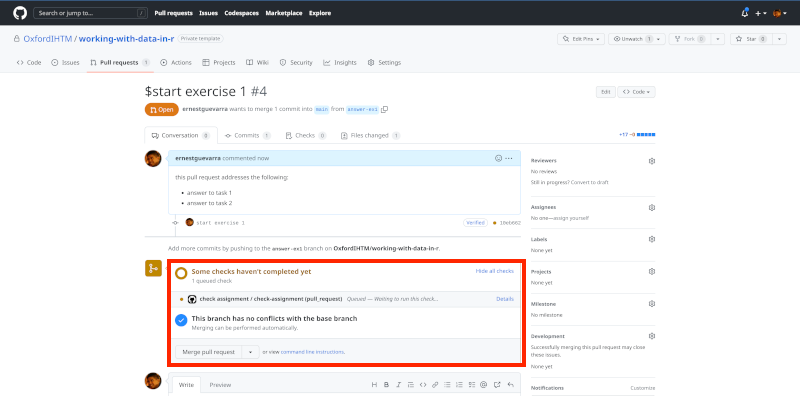
5. Wait for review
If the project has automated checks included, you will see that these checks will get initiated.
If there are no issues with the code, the automated checks should show that all checks have passed.
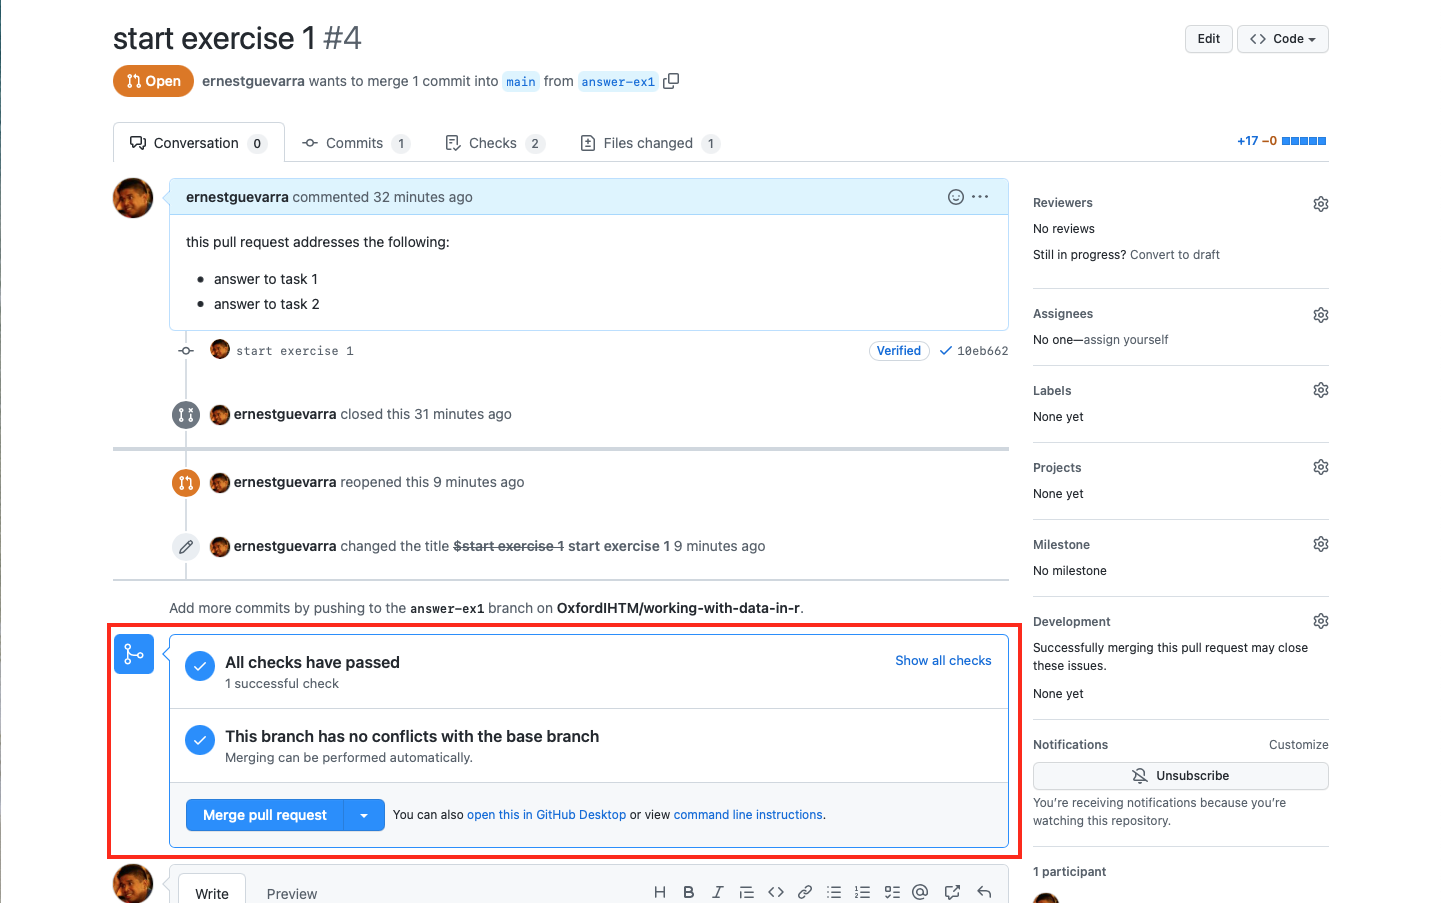
Wait for reviewer’s feedback/comments. If reviewer request’s changes, make changes to your code and then commit and push again (as above). If your project has automated checks, this will get triggered again within the same pull request. Your reviewer will be notified of the changes you have made and should review your work again. Once reviewer approves changes, you can then merge your work to the main branch.